 Sign in
 Sign up

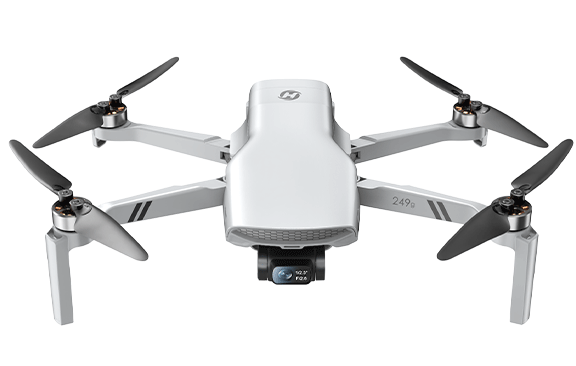
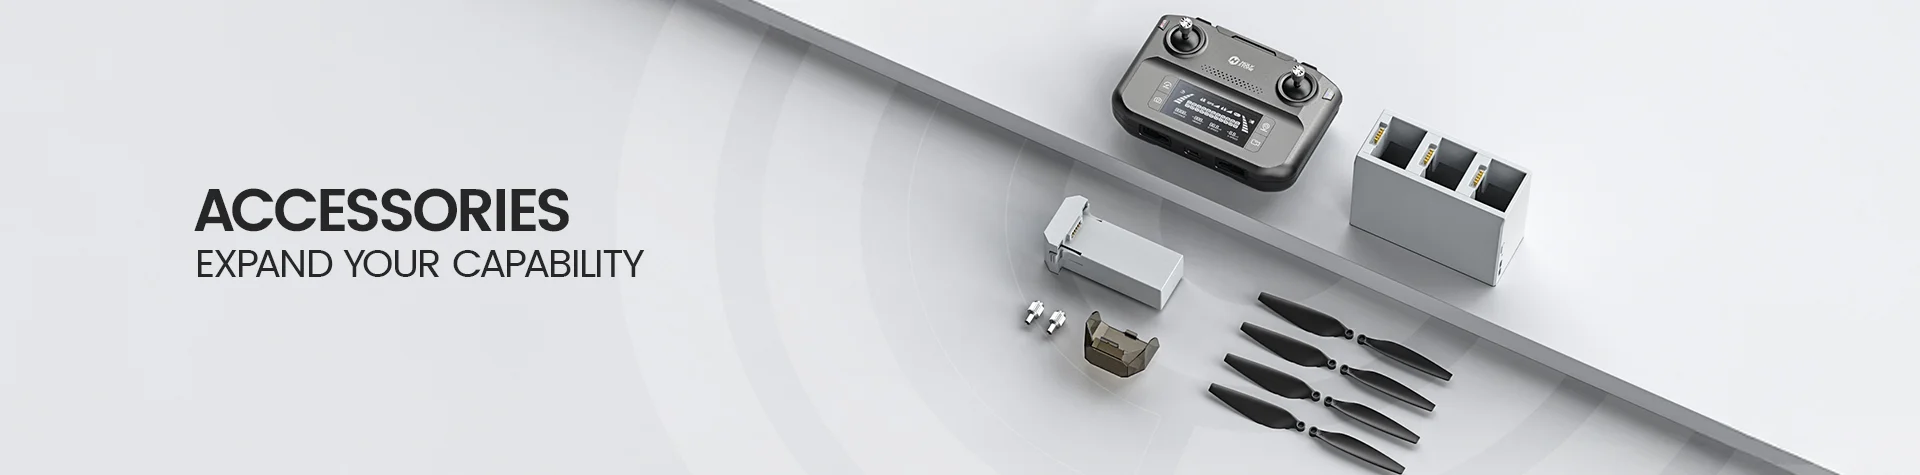
How to Take Better Aerial Photos with Assisted Shooting (HS900 Pro)

HS900 Pro — How to Take Better Aerial Photos
with Smart Assisted Shooting
Great aerial photos are not just about flying higher or using more expensive gear. They come from stability, scene awareness, and knowing how to use the right shot logic at the right time.
One of the first assumptions many people make when they get into drone photography is this: if the drone is more expensive, the shots must look better.
That idea is not completely wrong — but it is incomplete. The real difference between an average aerial photo and a memorable one usually comes down to how well you understand the craft itself.
To experienced aerial shooters, a good aerial image is rarely just “something captured from above.” It is the result of stable flight, clean framing, a clear subject, the right light, and a shot that feels intentionally designed rather than randomly taken.
In other words, aerial photography is not just about taking pictures in the air. It is a layered process that combines flight control, scene evaluation, shot selection, and equipment support.
What makes an aerial photo feel compelling?
Beginners often judge aerial photography by one thing first: image clarity. But in real creative work, sharpness is only the baseline. What truly gives a photo presence is whether it has visual structure.
A compelling aerial frame usually feels focused, layered, balanced, and intentional. It has a subject. It has depth. The light contributes mood. The angle adds something new. And above all, it feels clean and controlled.
Aerial photography is not just about showing a scene from above. It is about reorganizing the scene through perspective.
That is why experienced drone photographers do not ask “What should I shoot?” right before pressing the shutter. They ask different questions: What is the subject? At what altitude does it read best? Where is the light coming from? What distractions are inside the frame? Should this image emphasize scale, geometry, atmosphere, or motion?
Experienced pilots read the scene before they launch
One reason beginners struggle is that they often launch first and start looking for ideas later. More experienced aerial photographers usually work the other way around. They begin evaluating the scene before the drone even leaves the ground.
Not every location makes a strong aerial image. Some places feel visually flat from above: too cluttered, too random, too evenly lit, or simply lacking a clear visual anchor.
A clear subject
Buildings, roads, people, coastlines, ridges, or landmarks give the frame a visual anchor.
Natural lines
Rivers, paths, fields, intersections, and city blocks help create order and flow.
Depth and layering
Foreground, middle ground, and background separation make the image feel more dimensional.
Light with character
Side light, backlight, sunrise, and sunset usually create more shape and mood than flat midday light.
Why stability matters so much in aerial photography
In ground photography, composition and light often dominate the conversation. In aerial work, they are still essential — but stability becomes an equally important foundation.
Even a subtle drift in the air can weaken the frame. A rough turn can throw the subject off balance. Wind movement can make the image feel less controlled. In video, these issues become even more obvious.
This is why strong aerial results do not come from technique alone, and they do not come from hardware alone either. Flight skill helps you execute the move correctly. Equipment quality helps you execute it cleanly.
Why decent gear still doesn’t guarantee strong results
This is one of the most common frustrations in drone photography. A pilot may have a capable drone and still come home with footage or stills that feel ordinary.
Usually, the missing ingredient is not the camera. It is shot awareness.
A common beginner mindset
Fly up, look around, and capture whatever seems interesting.
A more developed creative mindset
Decide what kind of image or motion you want first, then choose how to fly for it.
Imagine photographing a coastal road. A beginner may simply fly high and shoot straight down. A more experienced aerial photographer might first ask: From which direction do the lines read best? Should the shot emphasize rhythm or scale? Would a lower angle make the road feel more dynamic? Should a car or a person remain in frame to provide proportion?
What one-tap cinematic shots actually do for beginners
Flight control matters — but not everyone starts with the ability to fly smoothly, frame consistently, and manage motion at the same time. That is exactly why intelligent shooting tools matter.
One-tap cinematic shots are not a shortcut around creativity. They are a structured way for newer pilots to access better shot logic earlier.
What these modes do is take movements that normally require control, timing, spatial awareness, and shot rhythm — and turn them into reliable, repeatable flight patterns.
They build visual instinct
They help you understand what types of movement feel cinematic in the first place.
They reduce cognitive overload
You do not have to manage flight, framing, timing, and speed all at once.
They create faster positive feedback
Beginners are more likely to get one usable, satisfying shot early — and that matters.
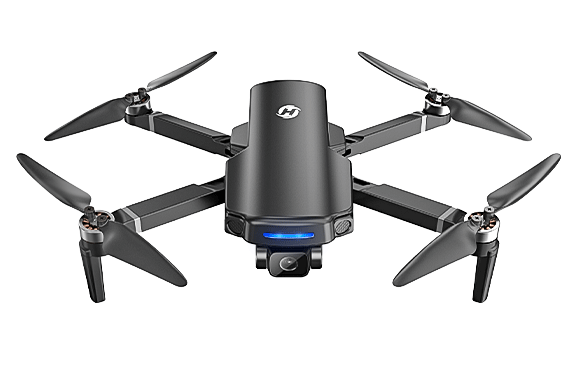
HS900 Pro Smart Shots: Shoot Better with Assisted Flight
Assisted flight modes help you capture smooth, intentional shots—no advanced control needed.
Start with simple flight paths like Rotation or Ascension, then explore how each mode changes composition, depth, motion, and storytelling.
Rotation
Add smooth motion and a stronger sense of depth with one guided movement.
Rotation is one of the easiest ways to understand how assisted flight can improve composition. On HS900 Pro, it helps you create a more cinematic result without needing to manually manage every movement at once.
Try it in open environments like roads, rooftops, fields, or architectural spaces where forward motion and rotation can create a clear visual flow.
Dolly Zoom
Create a dramatic perspective shift with more control and less guesswork.
Dolly Zoom helps pilots explore foreground-background relationships and produce a more cinematic depth effect. It is a great next step once you want your footage to feel more intentional and story-driven.
Use it with a clear subject and enough open space behind to make the visual effect more obvious and rewarding.
Ascension
Reveal the scene with a clean vertical rise and an instantly more dramatic view.
Ascension is one of the most beginner-friendly assisted flight modes. It makes it easy to move from a subject-focused frame into a wider environmental reveal without needing delicate manual input.
Start with a clear anchor point below, then let HS900 Pro lift the frame upward to show scale, context, and atmosphere.
Catapult
Pull back and expand the scene while keeping the subject visually grounded.
Catapult is useful when you want to show a person, object, or location in relation to the surrounding landscape. It helps reveal scale in a more controlled, polished way.
It works best when the subject is clearly separated from the background and the wider environment adds meaning to the shot.
Circle
Keep your subject centered while exploring angle, framing, and motion all at once.
Circle helps pilots understand subject tracking and framing consistency. It is especially useful for landmarks, buildings, and isolated subjects that benefit from a clean orbit shot.
With HS900 Pro, this assisted motion makes it much easier to create a more professional-looking result without constantly correcting manually.
Explore HS900 Pro and Experience Its Assisted Flight Features
From Smart Shots and guided movement to a more beginner-friendly flying experience, HS900 Pro is built to help you capture stronger footage with less friction.
The next step: designing the shot yourself
One-tap modes are not the final goal. As your eye develops, you begin to notice which movements create tension, which angles strengthen the subject, and which routes best serve the frame.
That is where more advanced tools begin to matter. Instead of choosing a predefined move, you start planning the route, the rhythm, and the way the frame evolves through space.
Final thought: strong aerial photography is not only captured — it is flown
So how do you actually take better aerial photos? Not by relying on one setting, one spec, or one trick — but by understanding the full chain behind the image.
Read the location first. Understand the light. Choose the right perspective. Keep the aircraft stable. Then use the right kind of motion to serve the frame.
For newer pilots, that does not mean mastering every control from day one. It means finding the right starting point and building visual confidence early.
HS900 Pro, Take Greater Control
Once you understand cinematic movement, the next step is learning how to shape the shot with more control.

COMMENTS